Tuesday, February 26, 2013

Paint.Net: Veggie Head

6.RST.3 - Follow precisely a multistep procedure when carrying out experiments, taking measurements, or performing technical tasks.

6.RST.7 - Integrate quantitative or technical information expressed in words in a text with a version of that information expressed visually (e.g., in a flowchart, diagram, model, graph, or table)

Today we will use some of the basic Paint.Net tools and concepts, and then create a Veggie Head. The Veggie Head project is a classic Photoshop tutorial which teaches you how to use a variety of tools and techniques to accomplish a seemingly easy task.


The task for today:
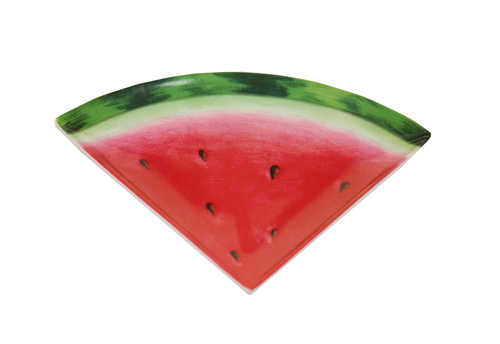
  1. Right-click on the image below of the watermelon or Cantaloupe to use as the head and SELECT "Copy Image" (or "Copy Picture" depending on your browser)
  2. Open Paint.Net 
  3. Go to FILE > NEW
  4. Go to IMAGE>CANVAS SIZE and set the Width and Height to 600 and Click OK 
  5. Go to EDIT > PASTE (you should now see the Watermelon or Cantaloupe as your 1st Layer on the White Background
  6. Your task is to take the various pieces, copy them, paste them, and clean them up to create a "Veggie Head". Some examples can be seen below:


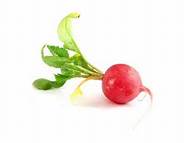
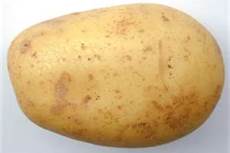
     7.   Use some of the images listed below as well to enhance your Veggie Head:


     8.  Be sure to save the file as Veggie Head.pdn  and save again as Veggie Head.jpeg


Monday, February 25, 2013

Paint.Net: Caricature Using Effects Tool Distort (Bulge)

6.RST.3 - Follow precisely a multistep procedure when carrying out experiments, taking measurements, or performing technical tasks.

6.RST.7 - Integrate quantitative or technical information expressed in words in a text with a version of that information expressed visually (e.g., in a flowchart, diagram, model, graph, or table)


Today we will be using the Paint.Net effects tools (Distort - Bulge) to create a Caricature of a famous person. A caricature is to make or give a comically or grotesquely exaggerated representation of someone or something. Generally you exaggerate something they are known for (Angelina Jolies lips, Adam Sandlers chin, Will Smiths ears, etc.).


Here are some examples of caricatures:


Here's my take on LeBran James:


On Drake

On Pauly D

On Charlie Sheen


And Obama:

And, of course, Justin Bieber:

Today we are going to use the use the Effects Distort Tools (Bulge)

1. Use Google Images to select the person of your choice.  Save the image into your Pics sub folder located in your Tech 6,7 or 8 folder.

2.  Open Paint.NET
Double-click on the Paint.NET icon if present on your desktop.
Select File > Open... , press CTRL + O or click the file open icon 
Browse to the H:\username\Tech 6,7 or 8\pictures\ and select the person of your choice click Open


3. When you have the image in Paint.Net go to EFFECTS>DISTORT>BULGE.


4. Do a CTRL+A (to "Select All") then CTRL+C (to "Copy)

5. Go to IMAGE>CANVAS SIZE> and Double the Size of the WIDTH (for Example change Width 650 to 1300)
Make sure Maintain aspect ratio is Unchecked


6. Go to Edit> Paste in to New Layer.

7. Drag Layer 1 over to the right to fill in the empty Canvas
 

8.  Go to EFFECTS>DISTORT>BULGE and adjust the Center and Bulge


9. Save File
      Select Save File As…
            Change Save as Type to JPEG (*.jpg;*.jpeg;*.jpe;*.jfif)


            Name the File Caricuture and Save.  Click OK to Save Configuration. Click Flatten
Maybe even add another Effect Tool such as Artistic Ink Sketch

Friday, February 22, 2013

Colorize a Black & White Image (Erase a Layer)

6.RST.3 - Follow precisely a multistep procedure when carrying out experiments, taking measurements, or performing technical tasks.


6.RST.7 - Integrate quantitative or technical information expressed in words in a text with a version of that information expressed visually (e.g., in a flowchart, diagram, model, graph, or table)


Colorize an Image by Erasing Layers

Another interesting way of "colorizing" an image is by pasting a black and white layer on top of the color layer and erasing the areas you want in color.  Confusing?  It will make sense after we try it.

Here's a sample image to get started [of course you can use your own]:


  1. Open an image.
  2. Do a CTRL+A (to "Select All") then CTRL+C (to "Copy)
  3. Go to File> New > and Click OK
  4. Go to Edit> Paste
  5. Go to Adjustments> Black and White to convert the image to black and white.
  6. Do a CTRL+A (to "Select All") then CTRL+C (to "Copy)
  7. Click on the original image that is in Color
  8. Go to Edit> Paste in to New Layer
  9. Click the Eraser Tool on the Tool bar.
  10. Use the Eraser tool to erase areas you want in color. Go Slowly and zoom in and adjust the brush size on the more difficult areas.
Next, locate another image where you can perform the same steps.  Make sure to add your finished projects to your portfolio.

Some Examples: